|
Tutorial-
Coloring and Text
1. Create a new layer underneath the
Line Art layer. Name it Base layer.
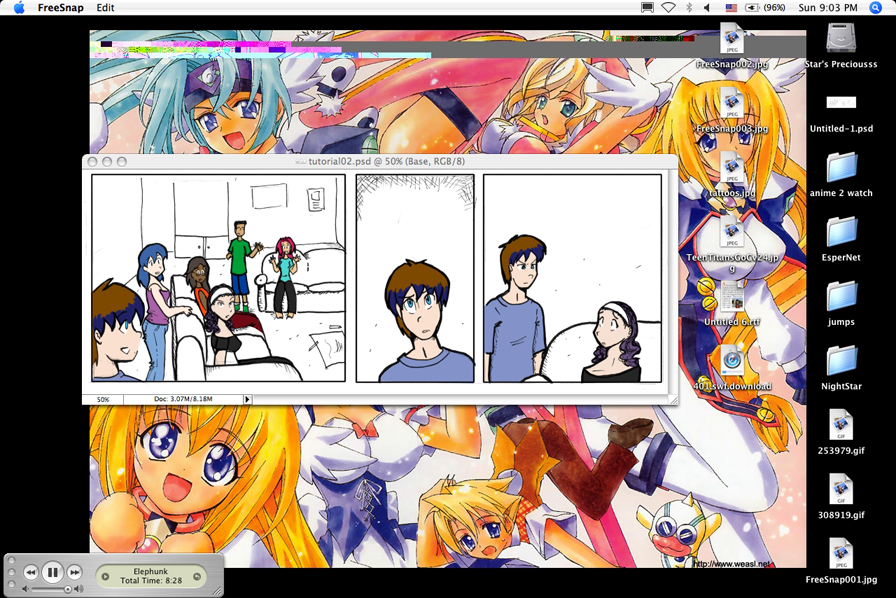
2. On the base layer, use the Polygonal Lasso Tool to begin outlining
a section that you want to color. I usually start with skin tones. (Tip:
After you select one section, if you want to continue to select another
piece press the shift key)
3. Select the color you want, and using the paint bucket tool fill in
the selection.

4.Do
this until all the characters are colored.
At
this point you might ask, why not just use the magic wand tool to make
your selections? The Polygonal Lasso one is tedious.
Well, the Magic Wand tool isn't as accurate as I would like it to be.
Plus, I would have to make sure that there aren't any open lines in
the picture at all. I find it more tedious to go and fix all the open
spaces than to just select the exact space I want with the Polygonal
tool. Plus, the Magic Wand tool comes in handy later, when you need
to do shading.
Your image should now have all the base colors for the characters filled.
5.
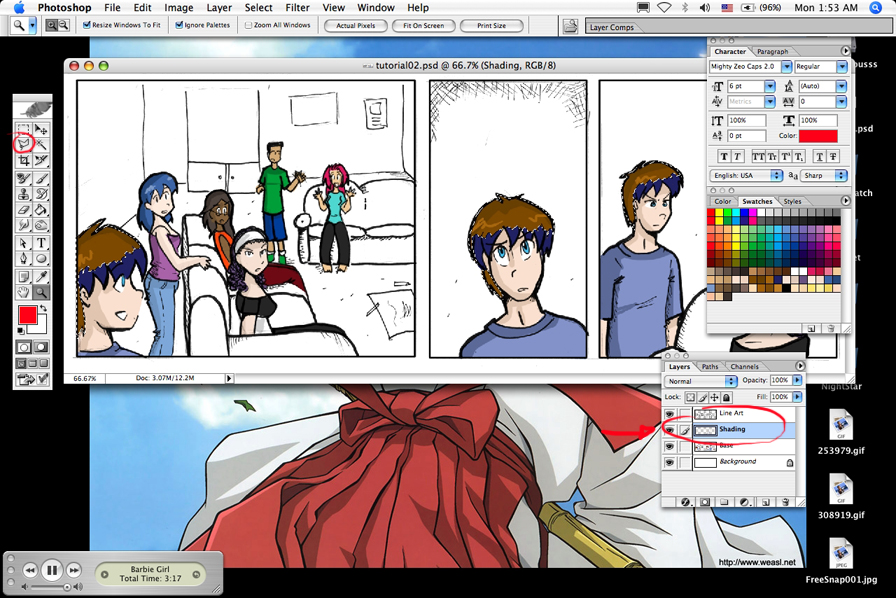
Create a new layer above the Base layer and name it Shading
6. In the Base layer, select the section you want to shade with the
Magic Wand tool. Then select the Shading layer.
7. Using the Eyedropper tool, click on the color in that selection.
8.Double clicking on the foreground color will bring up the Color Picker
box. Pick a slightly darker color than the one you've selected before.
Click Ok.
9. Select the brush tool and pick your desired brush size.
10. Begin to shade your selection.
11. Repeat process until all the characters are shaded.
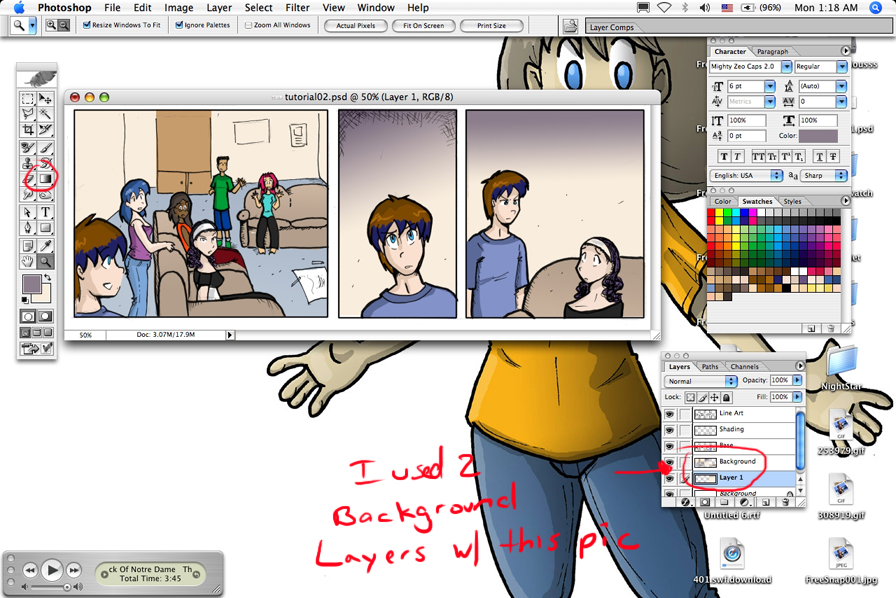
Now the background
1. Create a new layer underneath the Base layer and name it Background.
2.Do the same process as with the base layer, but use gradients instead
of the fill feature.
<<Previous
Page
Next
Page >>
Back
to Candi
|